Many admins prefer to create user accounts for any systems with minimum privileges due security reasons. So you may ask how to create a user account for Amazon S3 service with minimum permissions to backup databases with SQLBAckupAndFTP into a specified bucket and folder? It’s very easy. Just connect to AWS Console, create a group, specify policy for the group and add a user into the group. Let me tell you how to do it with detailed steps.
Log in to AWS Console
To log in to AWS Console, open https://console.aws.amazon.com/console/home page enter your e-mail address and password and log in. If you do not have Amazon.com user account, choose “I am a new user.” option to create it.
So, you should see navigation bar with menu items on the top of the page. Your name is on the right side, click at your name and then on “Security Credentials” menu item.
If you get a popup window with “You are accessing the configuration page for your root account credentials…” message click on “Get Started with IAM Users” button to manage your security credentials. On the left side of next page you should see items: “Groups”, “Users”, “Roles” and “Password Policy”. At first let’s create a group with security policy.
Create a group with specific security policy
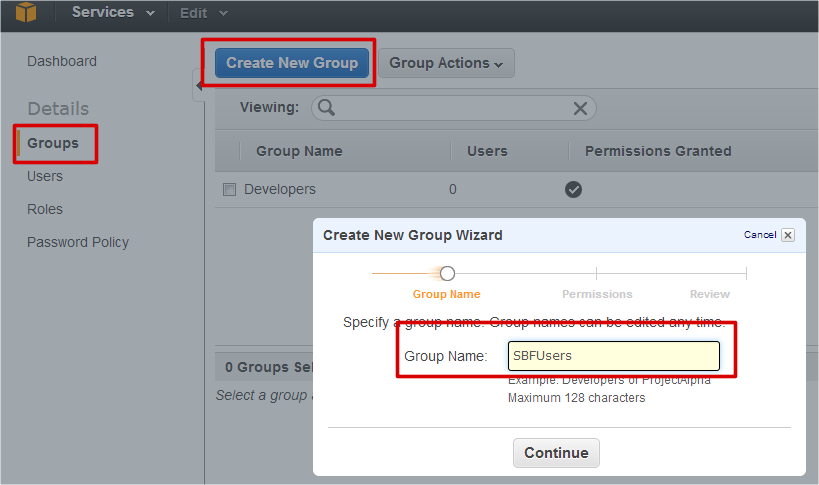
To create a new group, please select “Groups” item on the left side of AWS Console and click on “Create New Group” button. You’ll see “Create New Group Wizard” window where you can enter new group name. Please enter group name (let it be SBFGroup) and click on “Continue” button to specify a policy on the next step.
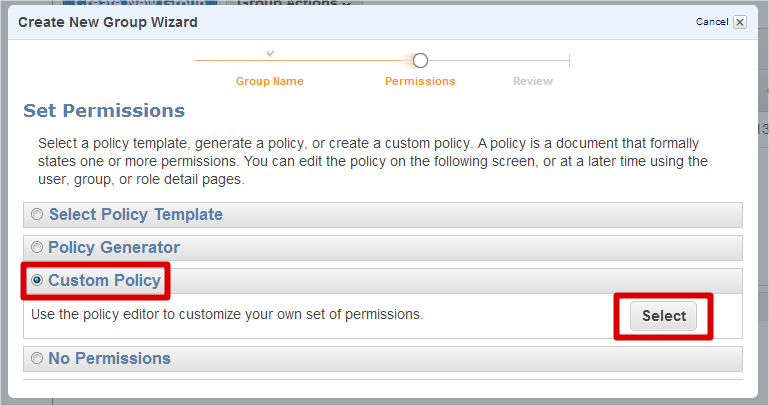
The wizard has a lot of policy templates, but let’s select “Custom Policy” item to create it manually.
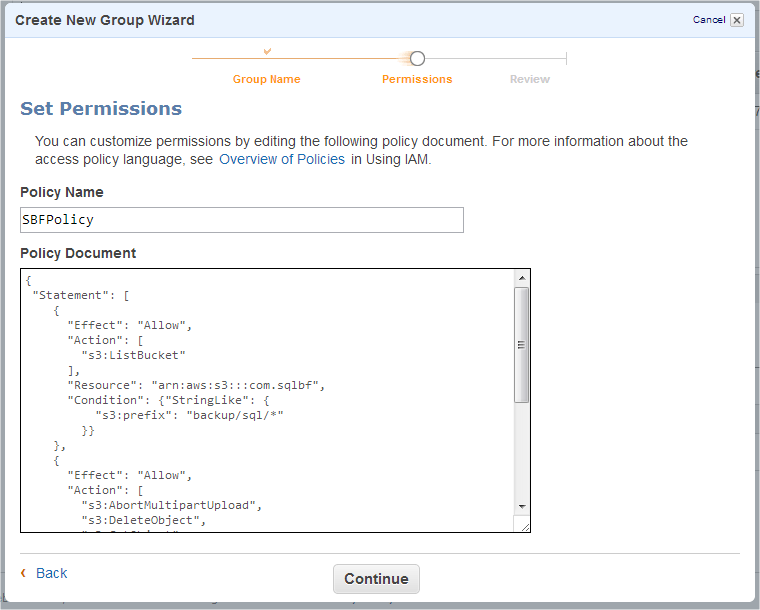
Now we can enter policy name and specify it manually. There is a good user guide where you can find Overview of AWS IAM Policies. But we have a specific purpose, so let’s use this policy document:
{
  "Statement": [
    {
      "Effect": "Allow",
      "Action": [
        "s3:ListBucket"
      ],
      "Resource": "arn:aws:s3:::yourbucketname",
      "Condition": {"StringLike": {
        "s3:prefix": "backup/sql/*"
      }}
    },
    {
      "Effect": "Allow",
      "Action": [
        "s3:AbortMultipartUpload",
        "s3:DeleteObject",
        "s3:GetObject",
        "s3:PutObject"
      ],
      "Resource": "arn:aws:s3:::yourbucketname/backup/sql/*",
      "Condition": {}
    },
    {
      "Effect": "Allow",
      "Action": "s3:ListAllMyBuckets",
      "Resource": "*",
      "Condition": {}
    }
  ]
}
Where backup/sql/ is the path to your backup files in yourbucketname bucket.
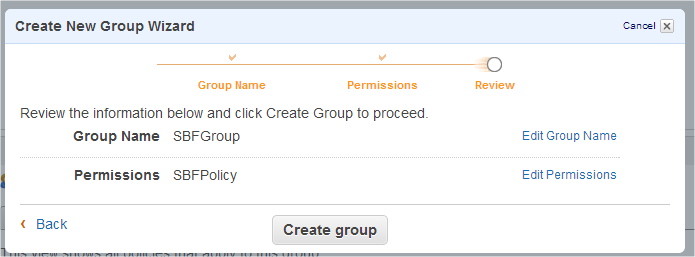
Click on “Continue” button to review the information about the new group and create it by clicking on “Create group” button.
So, we have a group that has enough permissions for database backup into your bucket with a specified path. Let’s create a user for backing up databases into Amazon S3 destination.
Create a user in the group
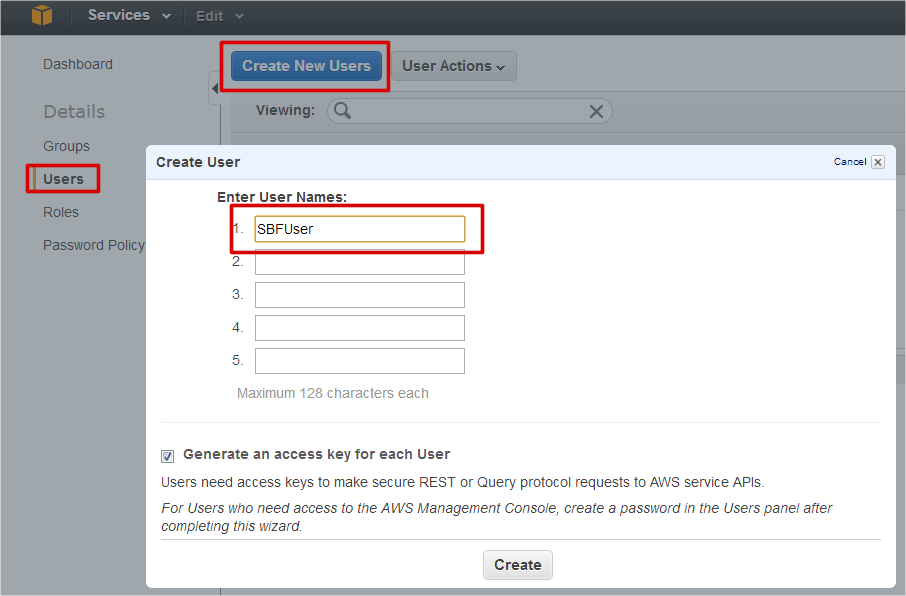
To create a new user, please select “Users” item on the left side of AWS Console and click on “Create New Users” button. You’ll see “Create User” dialog where you can enter user name and create it by clicking on “Create” button. Let it be SBFUser.
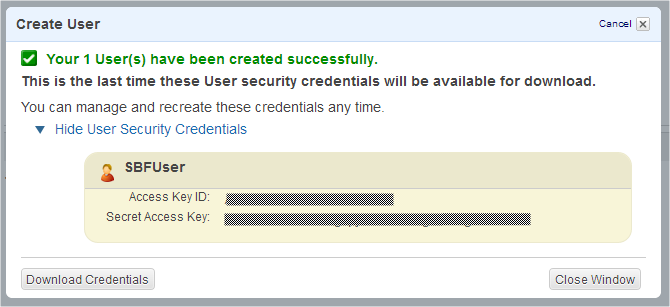
On the next step you’ll see a dialog with important message: “This is the last time these User security credentials will be available for download.” Please write down the user’s credentials. You’ll need them later to connect to Amazon S3 service with the created user. Also you can download file with the credentials to keep it on your side.
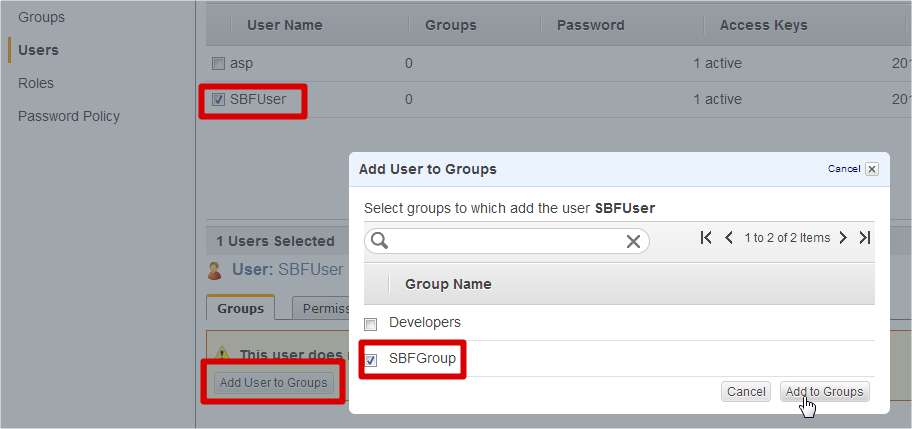
If you have saved the user credentials, you may close this window and let’s add the created user into our group. To do it, just select created user SBFUser on the console and click on “Add User to Groups” button. You’ll see “Add User to Groups” window, where you can select created group SBFGroup on a prior step.
Click on “Add to Groups” button to finalize this action and let’s backup a database with SQLBackupAndFTP into Amazon S3.
If you still do not have a bucket yourbucketname, you can create it on this console. Just use menu: “Services” → “S3” to open S3 Console and create a bucket.
Backup to Amazon S3 with SQLBackupAndFTP
Backing up databases to Amazon S3 destination is allowed in Standard version of SQLBackupAndFTP or above. If you have Free version of SQLBackupAndFTP, you can try this feature in trial mode. To enable trial mode of the application, just use menu: “Help” → “Start 30 days Free Trial…”.
So, select a database that you want to backup, click on “Add backup destination” link and select Amazon S3 destination on the popup window with destination types.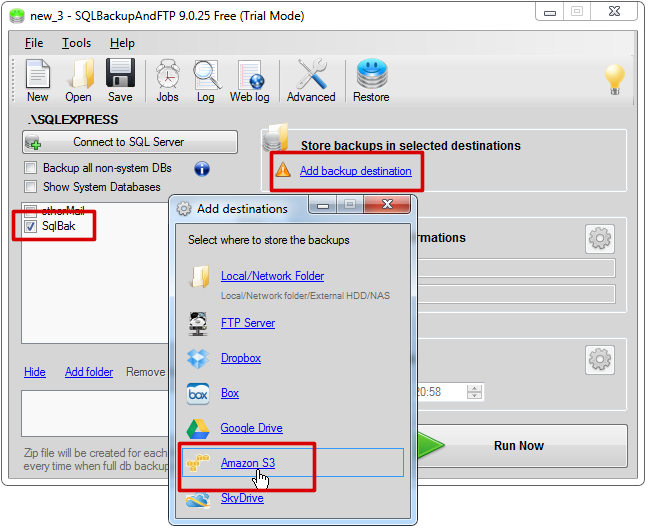
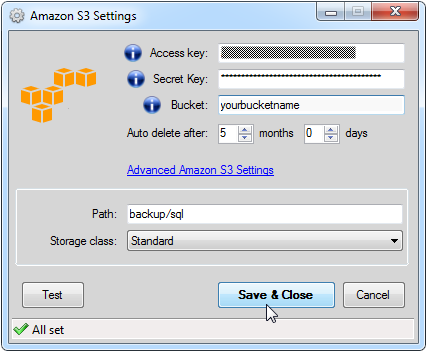
After that you can enter Access Key and Secret Key that you have already saved as your user credentials for Amazon S3 service. Also there are fields where you can enter bucket name and path to backups on “Amazon S3 Settings” window. Please remember to enter path to backups that you have allowed for backups using AWS Console.
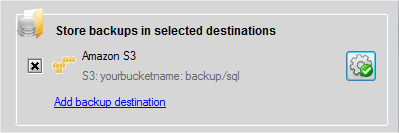
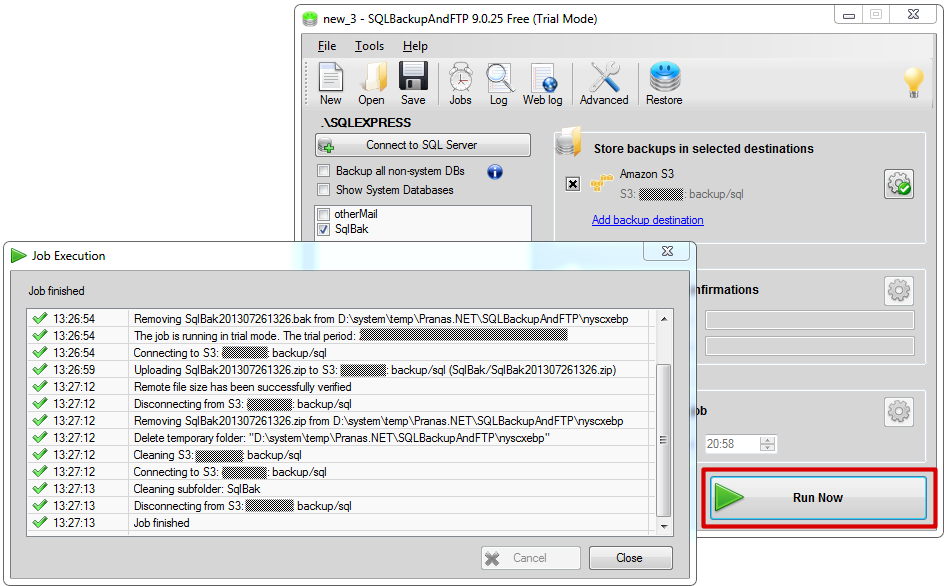
Click at “Save & Close” button and we have a job that can backups a database into Amazon S3 destination. You can run the job immediately by clicking on “Run Now” button.


Recent Comments